
The Ultimate Guide to Hiking Laugavegur Trail in Iceland
- GoAndXplore
- No Comments
The Ultimate Guide to Hiking Laugavegur Trail in Iceland
- GoAndXplore
- No Comments
Facebook
Pinterest
LinkedIn
Twitter
Can you imagine a place where you can see every possible variety of landscape that exists on earth? Well, that’s Laugavegur trail – the most popular hike in Iceland.
When Ola and I were hiking Laugavegur, we came across colorful mountains, black arctic deserts, towering glaciers, raging rivers, steaming geothermal areas, frozen lava fields, natural hot springs, deep canyons, and even lush green valleys.
Honestly, we can’t think of any landscape that we didn’t experience while on this trail. Every day, every hour gave us a glimpse of something unique… and we practically witnessed every color on the spectrum.
If you’re planning to explore Laugavegur trail, this detailed guide will answer all your questions.
TABLE OF CONTENTS
How Long is Laugavegur Trail?
The Laugavegur is located in the rugged southern region of Icelandic Highlands.
It starts from the geothermally-active nature reserve of Landmannalaugar before ascending over the windswept plateaus of Hrafntinnusker. The route then descends past the rugged river plains of Álftavatn and Hvanngil, crosses the black volcanic deserts of Emstrur/ Botnar, and finally ends in the lush birch valley of Þórsmörk (Thorsmork).
The trail is around 55 km (34 miles) in length and takes 4-5 days to complete. It can be hiked from either point: Landmannalaugar or Thorsmork. We are planning separate posts for both of these places, as there is a lot to say about them.
| Day | Start | End | Distance | Time | Elevation | Mostly |
|---|---|---|---|---|---|---|
|
1 |
Landmannalaugar |
Hrafntinnusker |
12 km |
4-5 hrs |
600m → 1,141m |
Ascent |
|
2 |
Hrafntinnusker |
Álftavatn |
12 km |
4-5 hrs |
1,141m → 537m |
Descend |
|
3 |
Álftavatn |
Emstrur |
16 km |
6-7 hrs |
537m → 465m |
Descend |
|
4 |
Emstrur |
Thorsmork |
15 |
6-7 hrs |
465m → 200m |
Descend |
You can also extend the hike by another 26 km (15 miles) by hiking the Fimmvörðuháls, which connects Thorsmork to Skógar’s coastal lowlands and passes between Eyjafjallajökull and Mýrdalsjökull glaciers.
Laugavegur Trail Map
Below are two versions of trail to download, the regular Laugavegur trail starting in Landmannalaugar with finish in the Walley of Thorsmork.
And extended version of the trail starting in Landmannalaugar going through Thorsmork and finishing in Skogar.
Landmannalaugar to Thorsmork Map & GPX
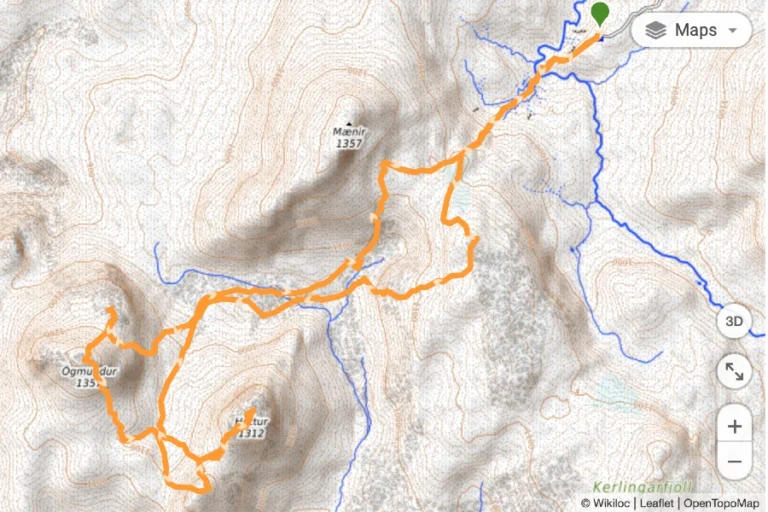
Landmannalaugar to Skogar Map & GPX
How to Get to Laugavegur Trail?
The majority of visitors hike the Laugavegur via the traditional north-south route, starting in Landmannalaugar and ending in Thorsmork. Some follow the reverse route. The hike can also be combined with the Fimmvörðuháls trail (which starts in Skogar and ends in Thorsmork).
But keep in mind that it’s a one-way route and not a loop. So, driving yourself to the starting point isn’t recommended unless you want to hike back or have a way to retrieve your vehicle afterward.
Let’s have a look now at all possible transportation options.
1. Taking Bus to Laugavegur Trail
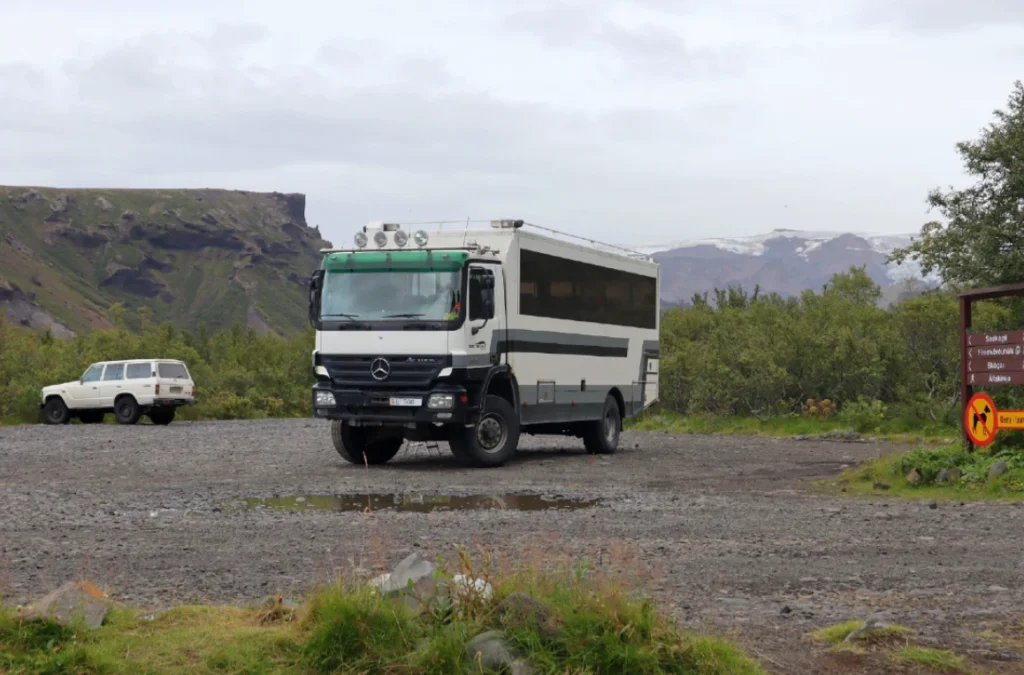
If you want to travel independently, this is the best option. Several Icelandic bus companies operate highland buses to and from the trailhead during summer (June to September). These buses are driven by expert drivers and can easily handle Iceland’s F-roads, which are rough, unpaved, and have river crossings.
Some bus operators also offer a flexible Hiking Passport or Hikers Bus Pass, which includes transport from Reykjavík to a starting point (Landmannalaugar, Thorsmork, or Skógar) and back from your chosen endpoint.
If you want to avail this option, several bus companies provide scheduled services, with stops near huts and campsites.
Trex offers the following travel packages:
Reykjavík → Thorsmork (13.900 ISK)
Reykjavík → Landmannalaugar (13.900 ISK)
Reykjavík → Hikers Bus Pass (25.900 ISK)
Reykjavik Excursions offers the following travel packages:
Reykjavík/ Hvolsvöllur → Thorsmork (11.999 ISK)
Reykjavík/ Selfoss/ Hella → Landmannalaugar (12.499 ISK)
Reykjavík/ Selfoss/ Hella → Skogar (8.999 ISK)
Strætó also operates a daily public bus route 51 from Skógar campsite to Reykjavík throughout the year. Please note that seats may book up fast in summer, so reserve your seats well in advance.
2. Joining a Guided Tour
If you prefer a convenient and hassle-free experience, you can join a guided tour that includes:
- Pick-up from Reykjavík (BSÍ Bus Terminal, hotels, or even the airport)
- Transportation by highland vehicles with experienced drivers familiar with Iceland’s challenging terrain
- Pre-arranged hut stays and meals, ensuring a smooth, stress-free hike
There are a number of tours available, but we like the following packages by Arctic Adventures, as they offer good value:
- 4-Day Laugavegur Trail Tour (Tents) – 1,711 USD
- 4-Day Laugavegur Trail Tour (Huts) – 2,009 USD
- 6-Day Laugavegur & Fimmvörðuháls Tour (Huts) 2,209 USD
These tours include accommodation, meals, transport, and luggage transfers.
3. Driving to the Trailhead
During summer, you can use a 4×4 to drive to Landmannalaugar or Thorsmork.
The drive from Reykjavík to Landmannalaugar takes about 3-4 hours via Route 1 (along the South Coast) → Road 30 → Road 32 → Road 26 → F208 → F224. Here’s the location of Landmannalaugar on Google Maps
The drive from Reykjavík to Thorsmork takes around 2-3 hours via Route 1 through the rough F249 road. This journey includes multiple river crossings. Here’s the location of Thorsmork on Google Maps
Skógar is accessible year-round by any vehicle via the Icelandic Ring Road/ Route 1. Here’s its location on Google Maps
Since the Laugavegur trail isn’t a loop, parking at one end means you’ll need transport back to your vehicle, so keep this in mind if you want to drive to the trailhead.
Ola and I drove to Skogar (since we hiked the trail in oposite direction). After ending our journey in Landmannalaugar seven days later, we took a tour bus to Hella. From there, we hitchhiked back to Skogar to retrieve our car. The parking was free, so we had no issues with leaving the car there for couple of days.
Best Time to Visit Laugavegur?
As a general rule, you can access Icelandic Highlands in summer, from late June to early September.
The temperature in summer months averages around 41–54°F (5–12°C) during the day and 34–41°F (1–5°C) at night. You’ll find snow in a number of mountainous areas, even in summer. You can also expect a lot of strong winds and frequent rainfall.
The Laugavegur trail is generally open from June 25th to September 15th, but this can vary from year to year depending on weather and snow conditions. Thorsmork opens sooner, usually in May.
Before you plan your visit, make sure to check for road closures by the Icelandic Road Authority and Laugavegur weather forecasts on Vedur.is and Yr.no.
The hiking season coincides with the Midnight Sun, so you can expect daylight for nearly 24 hours a day. The upside is, you get more time to explore… but don’t expect to witness the Northern Lights at this time of the year.
July is probably the best month for the Laugavegur trail, as the weather conditions are at their best. But it also means more hikers. If you want a little calmer experience, plan your hike for mid to late August or straight from the beginning of the season.
This is what Ola and I did. We visited Laugavegur in the second half of August. But even then, you may found a lot of hikers on the trail and huts are often fully booked.
During winter, you can explore Laugavegur on cross-country skis, but only skilled hikers/ skiers, carrying 5 season equipment can undertake this adventure. The other alternative is super jeeps or snowmobile/ skidoo, but a standard 4×4 jeep can’t drive there in the winter months.
The Highland huts are generally closed during winter (as the roads are closed too), but not in the case of Laugavegur. Laugavegur hut booking is possible even in winter months. You can contact FÍ management via phone or email for more information.
Where to Stay on Laugavegur Trail?
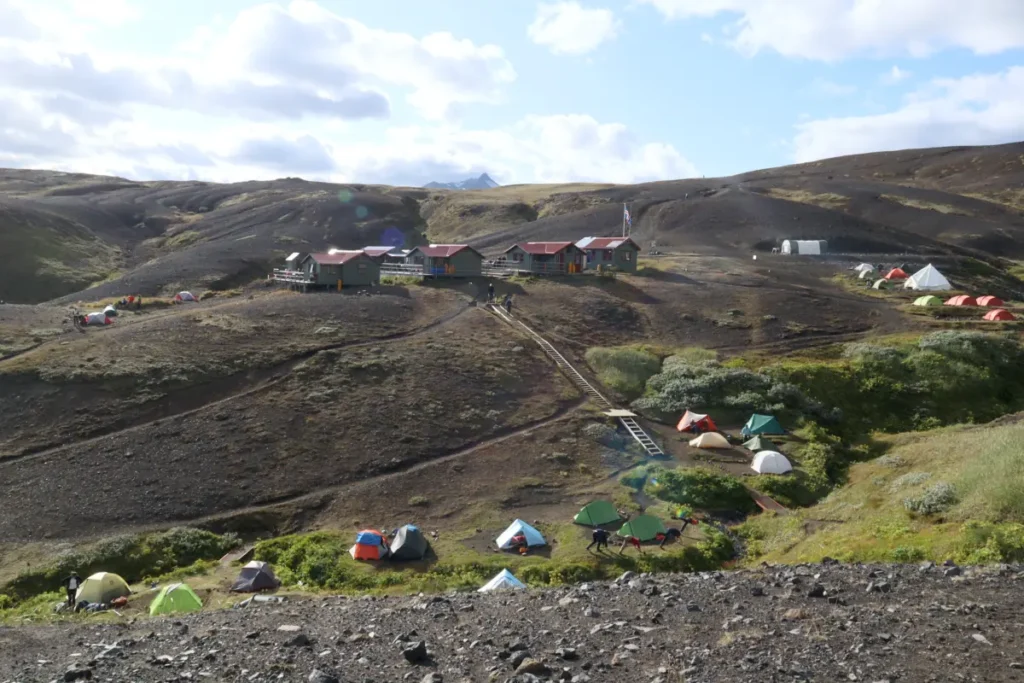
There are two accommodation options on the trail. You can either stay in a hut or pitch your tent at the campsite.
The Laugavegur has in total six campsites/ hut accomodations. All of them are operated by the Iceland Touring Association (Ferðafélag Íslands/ FÍ). The Fimmvörðuháls trail has two huts on the route. One of them (Baldvinsskáli hut) is owned by FÍ while the other (Fimmvörðuskáli hut) is owned by the Útivist touring club.
Laugavegur Trail Huts
Below are the Fimmvörðuháls and Laugavegur trail huts you will find on the trail.
| Hut | Trail | Capacity | Price | Elevation | Details |
|---|---|---|---|---|---|
|
Fimmvörðuháls |
Fimmvörðuháls |
18 |
12,200_ISK
|
1086m |
|
|
Baldvinsskáli |
Fimmvörðuháls |
16 |
15,000 ISK |
900m |
|
|
Thorsmork |
Laugavegur |
73 |
15,800 ISK |
200m |
|
|
Emstrur |
Laugavegur |
60 |
15,800 ISK |
465m |
|
|
Hvanngil |
Laugavegur |
60 |
15,800 ISK |
550m |
|
|
Álftavatn |
Laugavegur |
72 |
15,800 ISK |
550m |
|
|
Hrafntinnusker |
Laugavegur |
52 |
15,800 ISK |
1100m |
|
|
Landmannalaugar |
Laugavegur |
78 |
15,800 ISK |
550m |
Note: The price is per person per night. Please use the links on the right for Fimmvörðuháls and Laugavegur hut booking.
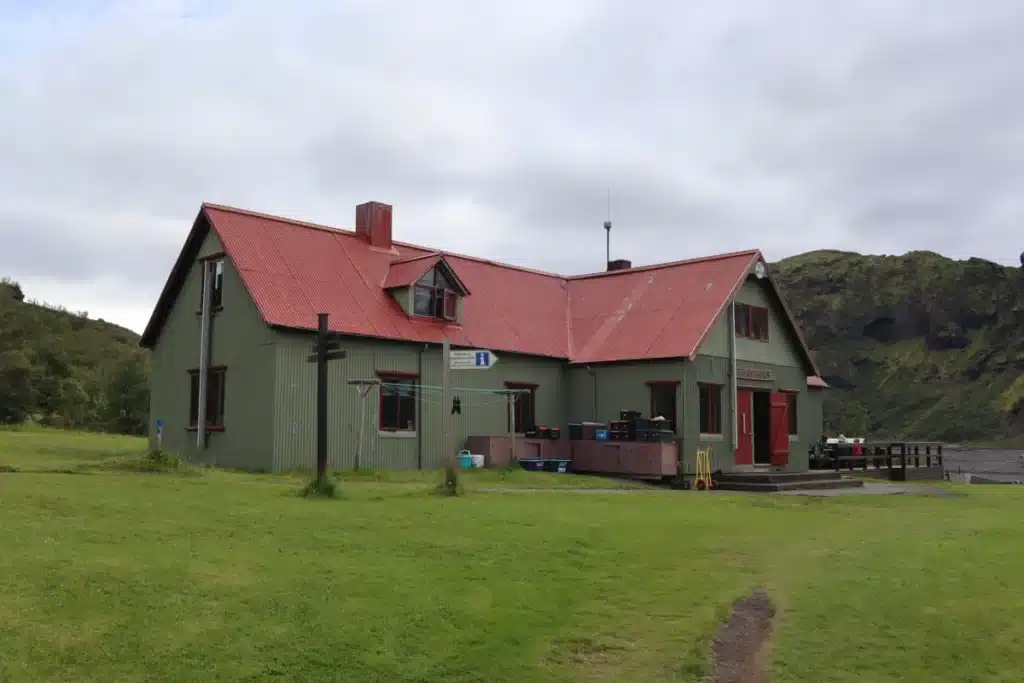
The huts have sleeping halls, quarters, dining areas, kitchens, and bathrooms. They don’t provide sleeping bags or blankets, so you’ll have to bring your own. The sleeping bags don’t have to be arctic-grade as the huts are slightly heated.
As for food, you’ll also need to bring your supplies. The huts sell soda, candy bars, backpacking dried food, and stoves, but you can’t get hot meals. Beer and wine are only available in Thorsmork. Thankfully, there is plenty of water in streams and rivers along the trail, so you don’t need to carry it.
The huts have indoor kitchens with all utensils and stoves, as well as outdoor grill areas. The larger huts have running water and flush toilets, but the smaller ones require you to fetch water from nearby streams and use outdoor lavatories. As for the garbage, you’ll have to carry it back with you from the Baldvinsskali, Emstrur and Hrafntinnusker huts.
Also, the travelers must respect quiet hours, clean up after themselves, and adhere to other hut rules.
Being one of the most popular hiking trails in Iceland, Laugavegur hut booking needs to be made well in advance. Sometimes, there is a chance to book at the last minute, but we would not rely on it.
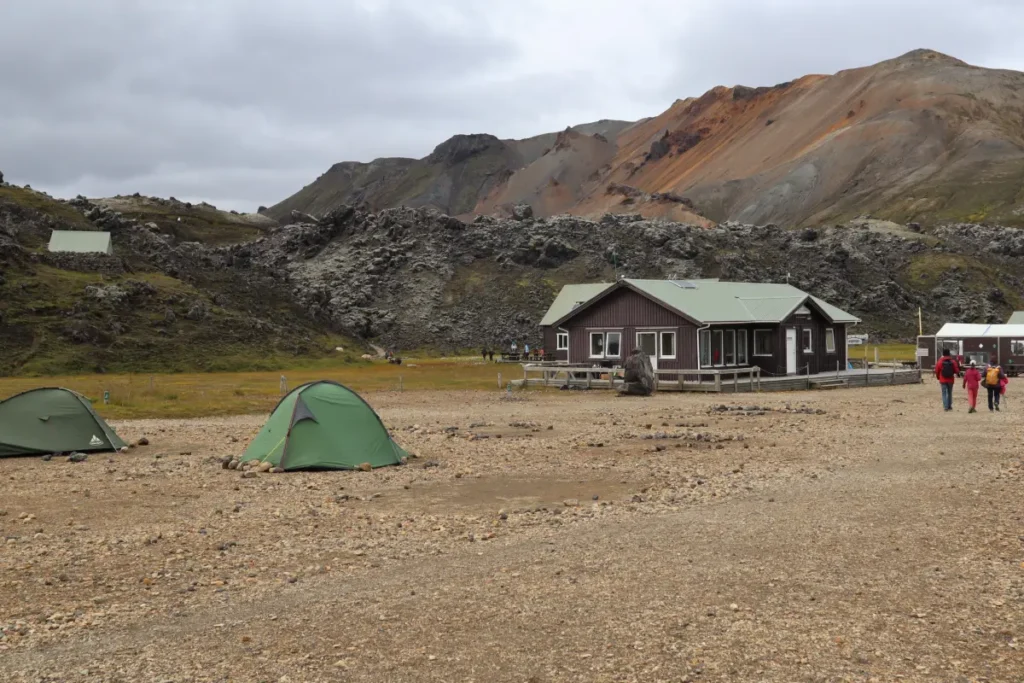
Laugavegur Camping Sites
Unlike Laugavegur trail huts, you don’t need to make a booking to stay in tent. There’s always plenty of space at the campsites.
Camping costs 3,200 ISK (24 USD) per person per night for campsites owned by FÍ. For the Fimmvörðuháls hut, I believe the fee is 2,400 ISK (18 USD) per person, but I’m not 100% sure here.
Campers need to bring their utensils, stove, and cooking gear, as they can’t use the kitchens or other indoor hut facilities. They can, however, use toilets, outdoor grill areas, and outdoor benches by paying a facility fee of 700 ISK (5.2 USD) for all FÍ campsites.
The shower fee in FÍ huts is 1,000 ISK (7.5 USD) for 5 minutes. The showers aren’t available in the Hrafntinnusker and Baldvinsskáli huts.
Please keep in mind that you can only pitch your tent in the designated areas close to the Laugavegur trail huts, and it’s strictly forbidden to camp elsewhere.
Huts vs Tents: Which is Better?
Lodging in mountain huts provides shelter from harsh weather. It also gives you access to indoor toilets and kitchens, eliminating the need to carry cooking gear. On the downside, Laugavegur trail huts can be quite costly and you have to book them in advance.
Pitching your own tent at Laugavegur camping sites is not only more affordable, but it also offers you greater privacy. The downside is, that you have to carry more gear and you’re exposed to sometimes extreme Icelandic weather.
Our strategy was to stay in a tent and ask the huts whether they had some spots available directly at the site when we arrived (in case of harsh weather). And so it happened as we got caught by an intense storm during the night at Emstrur/ Botnar, and were moved in emergency to one of the huts.
Photography on Laugavegur Trail
The Laugavegur hike offers practically infinite opportunities for photography. The following areas are worth mentioning.
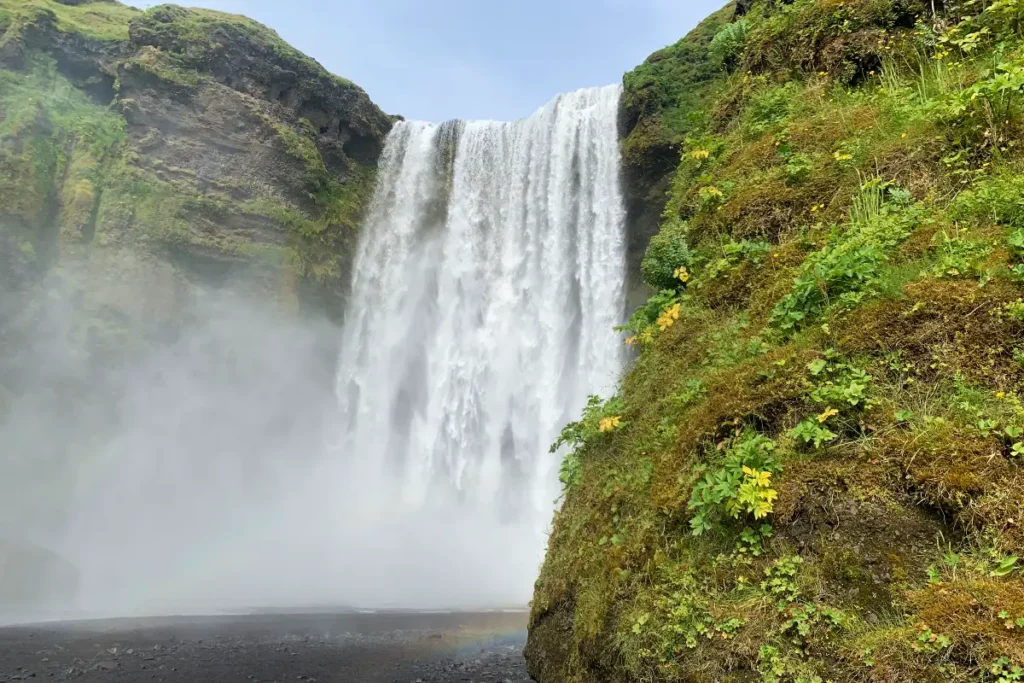
- Skógar – The start/end point of the Fimmvörðuháls trail, is home to a number of waterfalls. The most iconic waterfall – Skógafoss – is 60 meters (196 feet) high, and is considered one of Iceland’s most stunning cascades.
-
Fimmvörðuháls – It’s a striking mountain pass between the Eyjafjallajökull and Mýrdalsjökull glaciers. In 2010, a massive volcanic eruption from Eyjafjallajökull created two craters. These were named Magni and Móði, after Thor’s sons. The fresh lava fields you find here are truly a sight to behold.
-
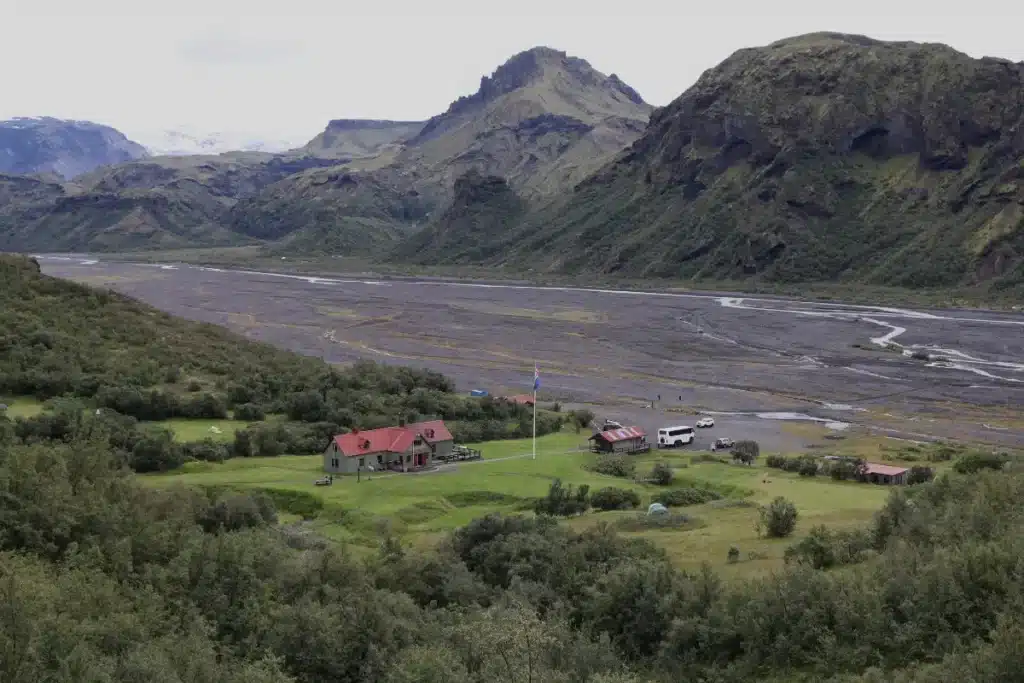
Thorsmork – It’s a lush green valley of birch forests located between three glaciers: Tindfjallajökull, Mýrdalsjökull, and Eyjafjallajökull. The name translates to “Valley of Thor”. The valley is also home to the Sönghellir cave system as well as Tröllakirkja, a captivatingly unique rock formation. Thorsmork is truly a hiking paradise, offering a number of long and short hikes.
-
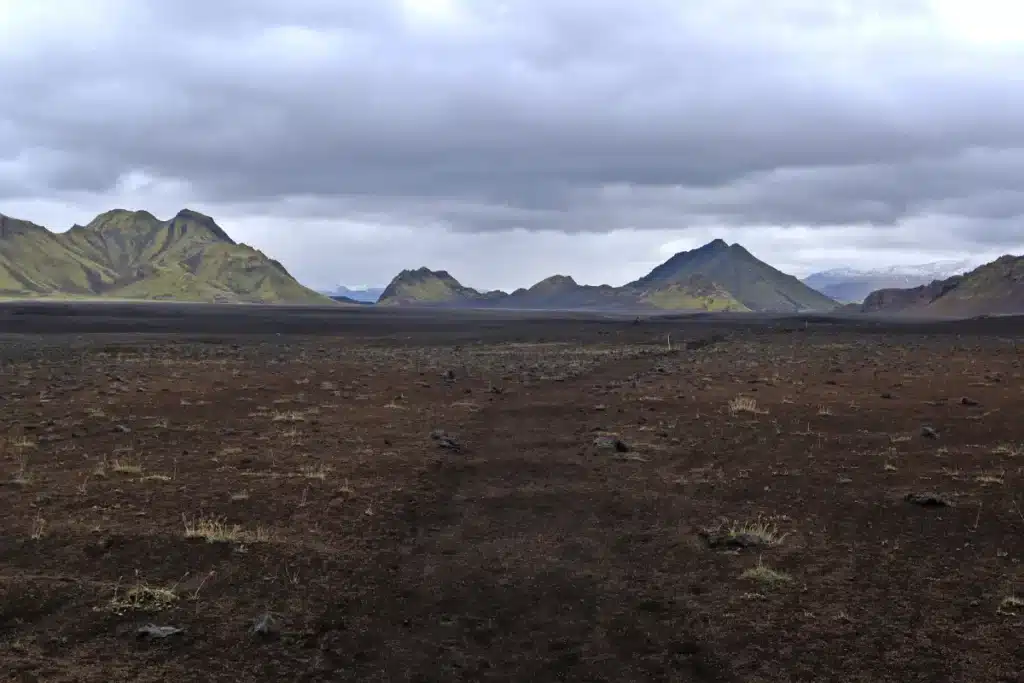
Emstrur/Botnar – Emstrur is a barren desert landscape with black sand plains and steep canyons. The biggest highlight of this area is Markarfljótsgljúfur canyon, which plunges 200 meters (656 feet) into the earth. The snow-capped mountains in the distance contrast against the rugged, volcanic surroundings make for the perfect frame for any camera enthusiast. It reminded us of our trip to Stokksnes Peninsula.
-
Hvanngil – It’s a scenic valley nestled between moss-covered hills and lava fields. The black sand plains and hardened lava formations create just the right frame for your snaps. This area also offers an escape from the harsh highland winds.
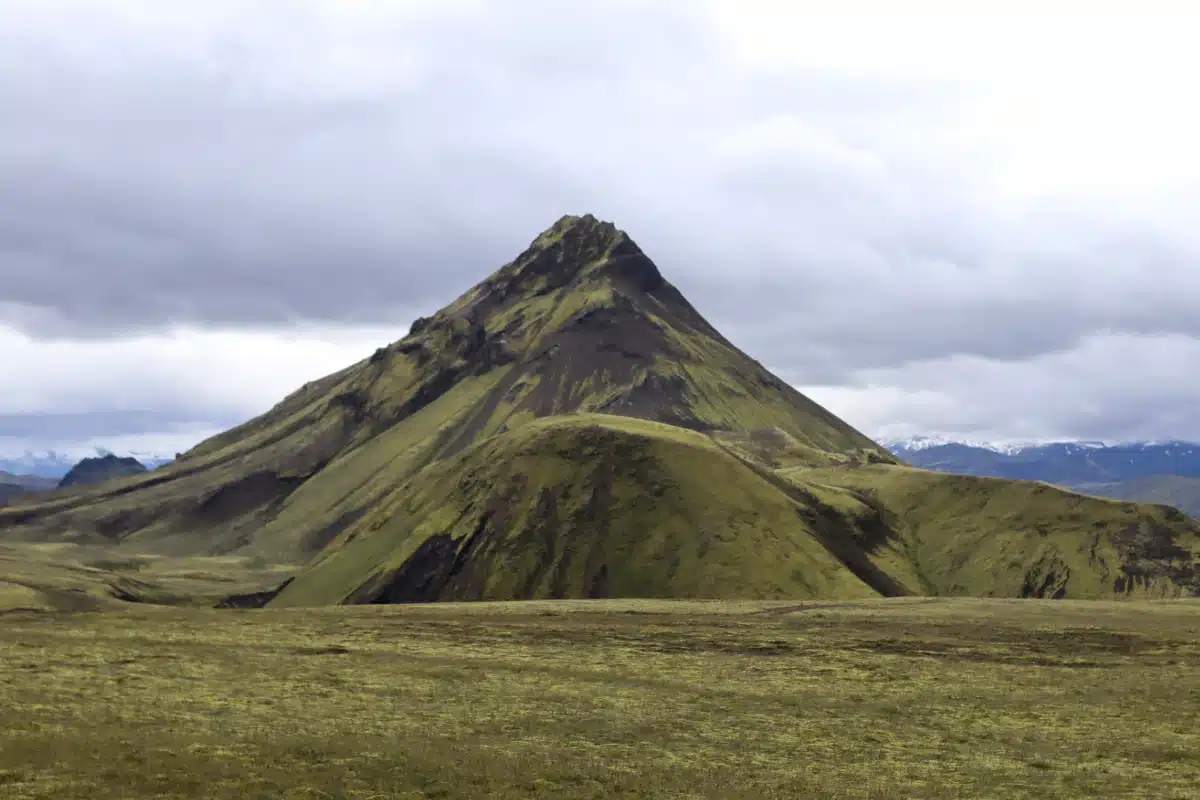
- Álftavatn – It’s a peaceful lake surrounded by rolling green hills and volcanic terrain. It’s also known as “Swan Lake” for the whooper swans that visit it. We particularly loved the pyramid-like-shaped mountain in the backdrop that created a nice photo background.
- Hrafntinnusker – A rugged volcanic plateau named after the black obsidian rocks scattered across its surface, this remote, windswept plateau is the trails’ highest point with an elevation of 1,141 m (3,743 ft). It’s extremely challenging, but equally rewarding. The steam vents rising from the ground create a dramatic scenery that feels right out of a sci-fi movie.
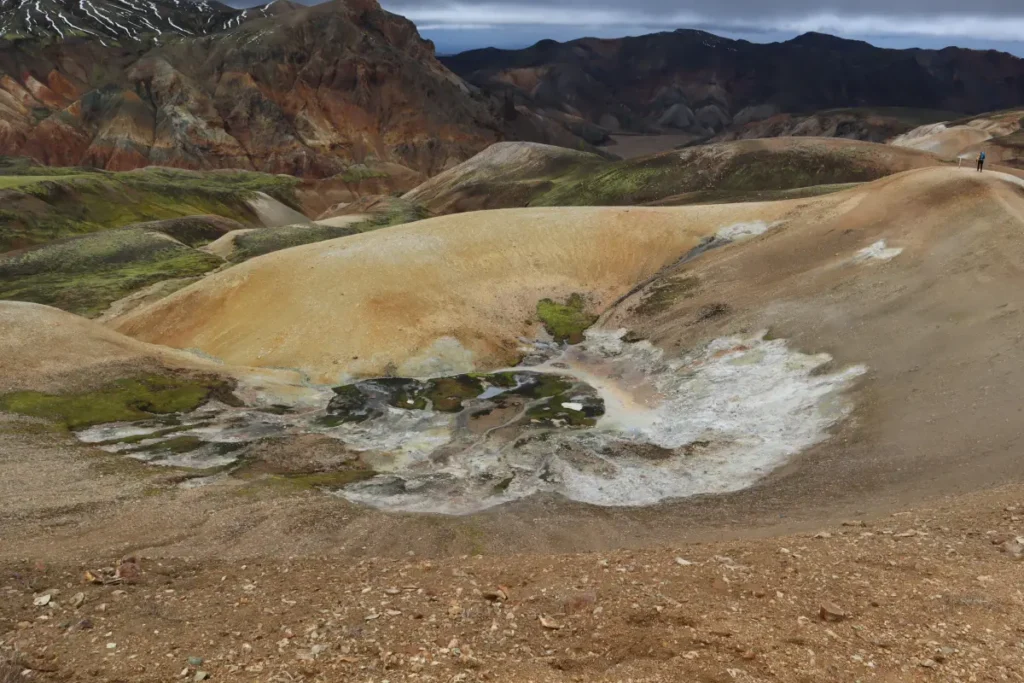
- Landmannalaugar – The start/end point of the Laugavegur hike, Landmannalaugar is a geothermally-active nature reserve, famous for its colorful rhyolite mountains. Known as the “Rainbow Mountains,” these hills create a surreal setting with shades of red, pink, green, and yellow slopes. You can also visit the Brennisteinsalda volcano and Bláhnúkur (also known as the Blue Peak).
Here is the reel from our adventure, a little spoiler 🙂
Which Direction to Hike Laugavegur?
The Laugavegur trail can be hiked in either direction – north to south (Landmannalaugar to Thorsmork) or south to north (Thorsmork to Landmannalaugar). Both routes have their own advantages.
North to South (Traditional Route)
Most hikers follow the traditional north-to-south route due to the following reasons:
- Gradual descent: The trail slopes goes downhill in this direction, which makes it an easier hike. Hiking south to north is more challenging since the first days involve more uphill climbs.
-
Best reveal of landscapes: You start in geothermal terrain, then pass through glacial valleys, volcanic peaks, and black deserts
before finally reaching lush birch forests in Thorsmork. The panoramic views of Álftavatn and the southern glacier from Jökultungur create an unforgettable moment when they suddenly open up before you.
South to North (Reverse Route)
The reverse option has its own advantages:
- Landmannalaugar’s rewards: Finishing your hike at Landmannalaugar’s Rainbow Mountains makes for a breathtaking final reward. Also, Landmannalaugar has natural hot springs, which offer relaxing experience after several days of hiking.
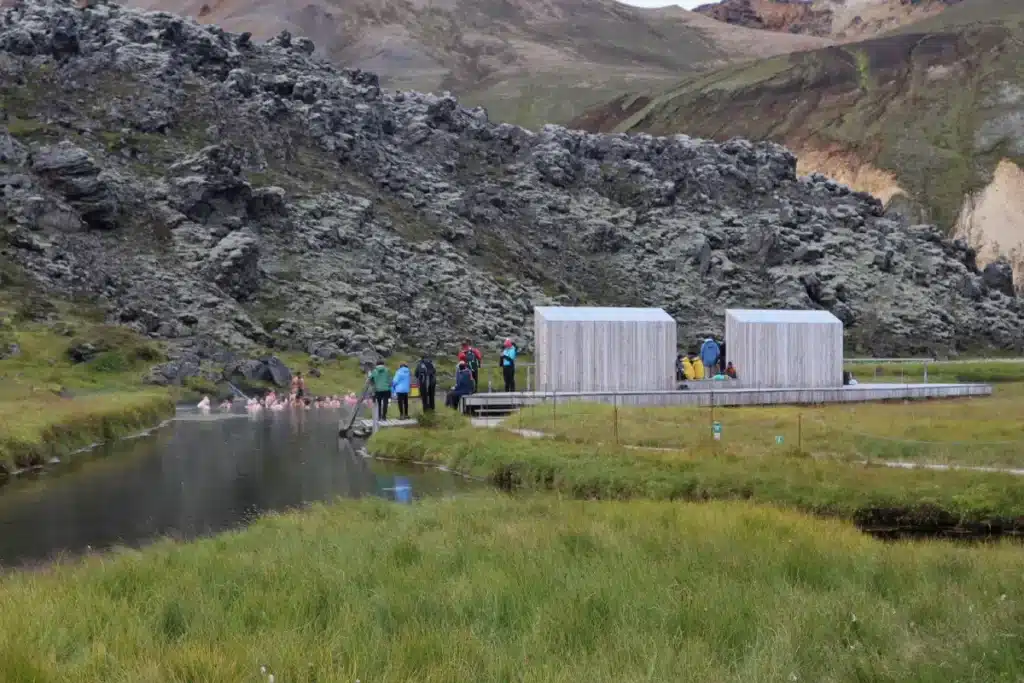
Moreover, Landmannalaugar offers a number of day hikes that you can explore if you have time.
-
Fewer crowds: Since most hikers go north to south, you’ll have a quieter and more serene experience. You will be hiking in solitude in the mornings and evenings, and will only pass people in the middle of the day. But again, it’s a plus only if you prefer a secluded experience over a bustling one. And if that’s the case, you might also want to add Kerlingarfjöll to your bucket list, as it’s way less crowded than the Laugavegur.
- Better waterfall views: If you love waterfalls, hiking northward will let you approach waterfalls straight from the front. So, no need to constantly look back as you move ahead.
Hiking Laugavegur With Fimmvörðuháls
If you hike the Fimmvörðuháls and Laugavegur trails together, it takes 5-6 days instead of the usual 3-4 days. You can start in Landmannalaugar and end in Skogar (while passing through Thorsmork on the way) in the traditional north-south manner. Or you can start in Skogar and hike in the opposite direction. This is what Ola and I did.
Our Laugavegur Hiking Itinerary
We took 7 days as we added an extra day for a day hikes in the Basár/Thorsmork area, and another day in Botnar to wait out a storm (more on it shortly). We decided to travel the opposite direction, and started our hike from Skogar.
| Day | Start | End | Distance | Trail |
|---|---|---|---|---|
|
1 |
Skogar |
Baldvinsskáli |
13.7 km/ 8.5 miles |
Fimmvörðuháls |
|
2-3 |
Baldvinsskáli |
Basár/Thorsmork |
14.3 km/ 8.9 miles |
Fimmvörðuháls |
|
4-5 |
Basár/Thorsmork |
Botnar |
16.2 km/ 10.1 miles |
Laugavegur |
|
6 |
Botnar |
Álftavatn |
16.2 km/ 10.1 miles |
Laugavegur |
|
7 |
Álftavatn |
Landmannalaugar |
23.8 km/ 14.8 miles |
Laugavegur |
DAY 1: Skogar → Baldvinsskáli (Fimmvörðuháls)H3
Total Distance = 13.7 km
Total Ascent = 1,002 m
The Fimmvörðuháls trail begins in Skogar, at the steps above Skógafoss. It’s one of the most popular waterfalls in Iceland, and is often crowded with tourists. But for those who are willing to walk a few extra miles upstream, there are a lot of other waterfalls to explore. The further you go, the quieter and more peaceful the surroundings become, making it well worth the effort.
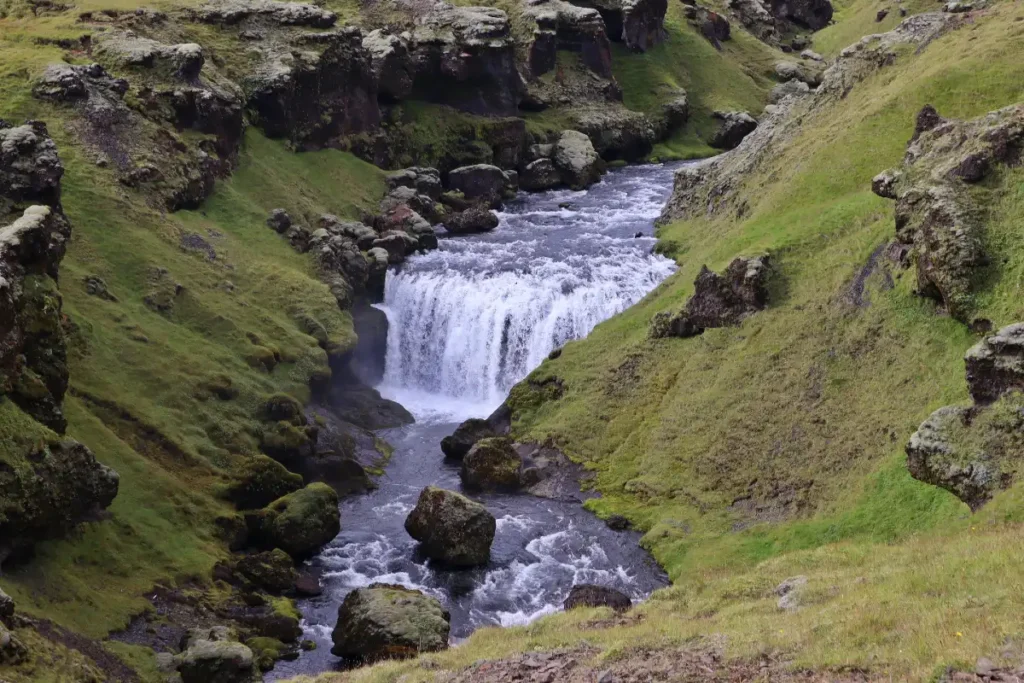
After exploring Skógafoss, we followed the Skógá river upstream.
The Fimmvörðuháls trail is considered tougher than the Laugavegur hike. This is true for the second section of the trail, as the first section (from Skógar to Baldvinsskáli) is not too difficult. The path closely follows the river, making navigation simple, and there’s little technical terrain to worry about.
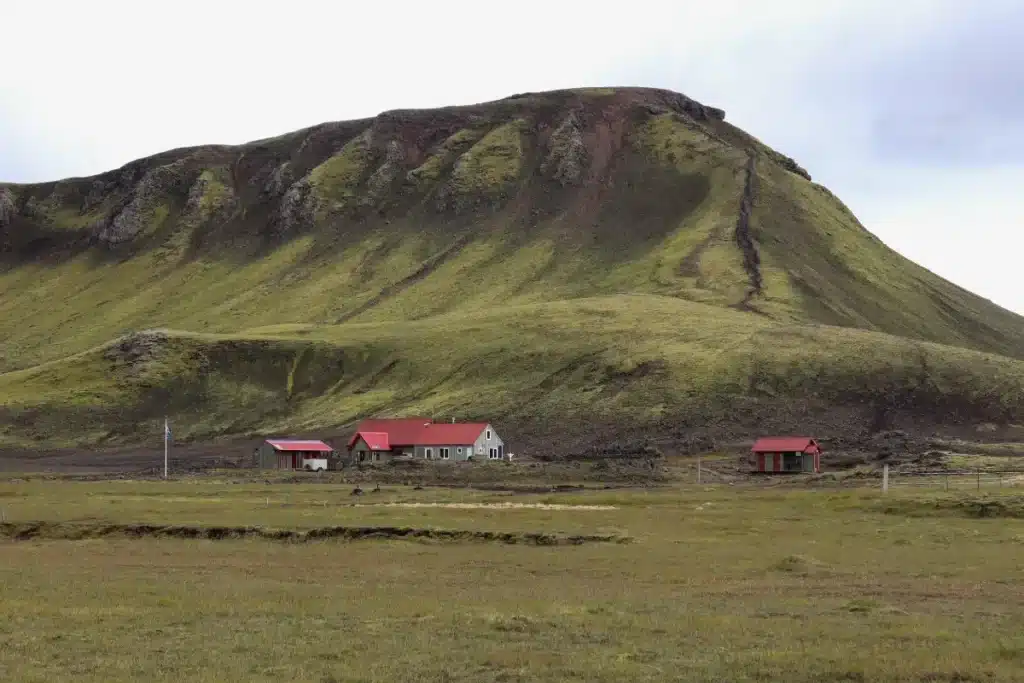
After reaching Baldvinsskáli, we pitched our tent at the small campsite close to hut. The weather was harsh. We were hit with intense winds all night.
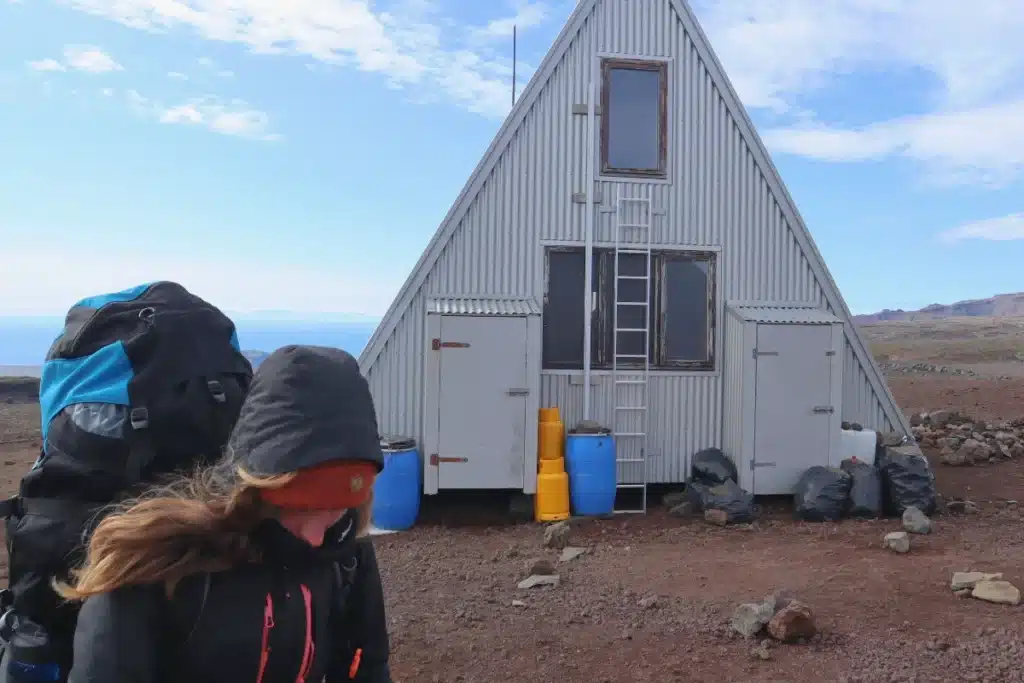
There was no mobile reception, but every hut along the trail provides an updated two-day Laugavegur weather forecast to help hikers plan ahead.
DAY 2-3: Baldvinsskáli → Basár/Thorsmork (Fimmvörðuháls)
Total Distance = 14.3 km
Total Ascent = 332 m
The most demanding part of the trail comes after Baldvinsskáli hut, where you navigate a mix of icy stretch, black sand, and volcanic ash. The glaciated section is small and can be crossed without crampons. But some parts were tricky. We saw a few hikers losing their footing, so take it easy there and mind your steps!
After the icy section ended, we came across a steep climb that winded around Magni volcano and its magma field. It’s easily one of the most fascinating parts of the hike. The trail splits before the climb, with the detour going to Fimmvörðuháls hut.
Walking on cold magma was a surreal experience, and a true highlight of this section.
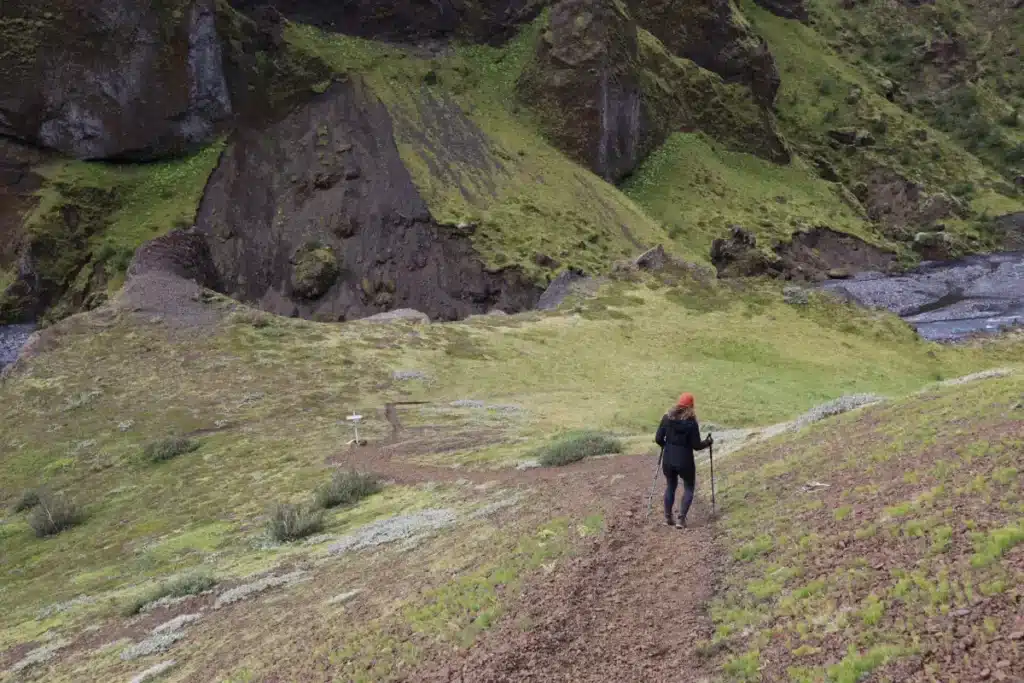
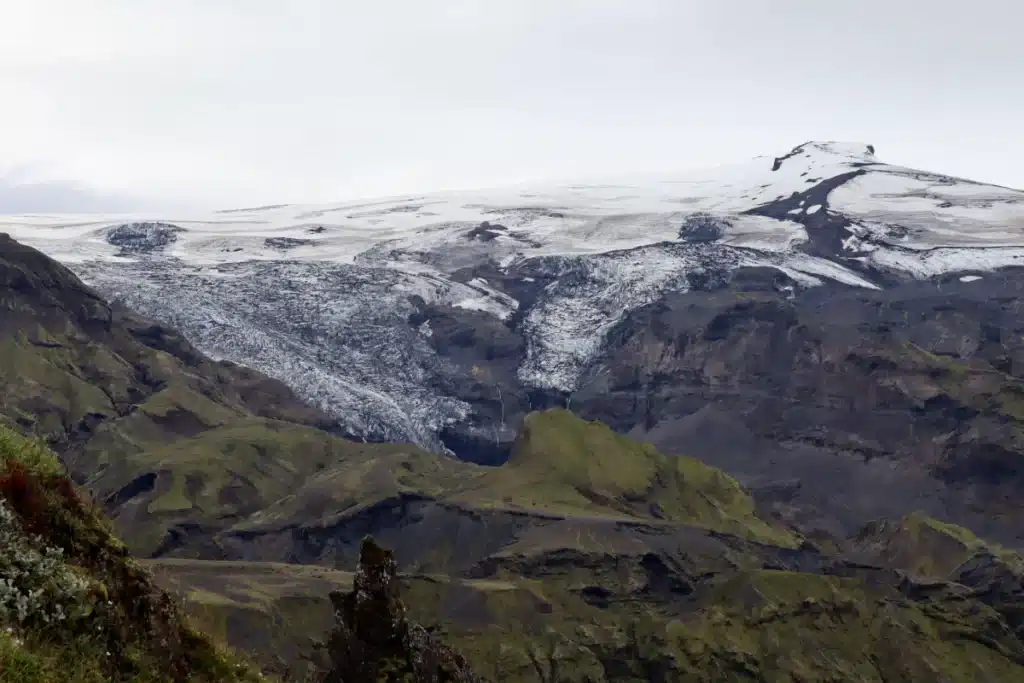
After passing through the lava field, the trail drops steeply to a plateau with stunning views of Mýrdalsjökull glacier.
As we descended further, the landscape became greener, signaling the entrance to Thorsmork Valley.
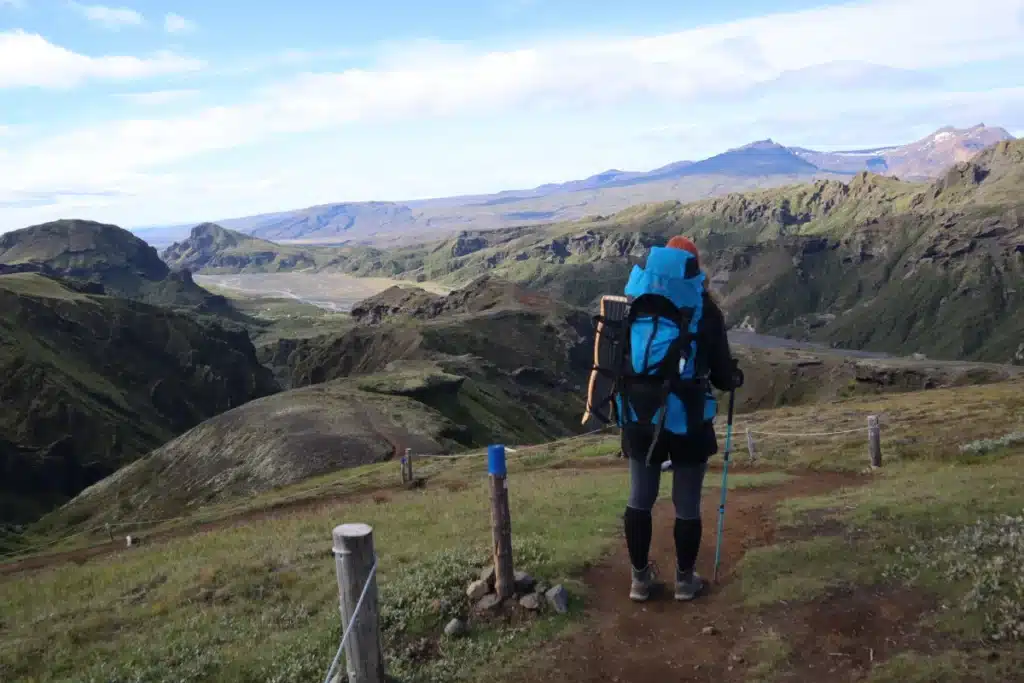
The first campsite we passed was Basár.
We loved the Basár campsite so much that we stayed there for two days. This was not just because of the captivating landscape, but also because of the incredible sunny weather that we were fortunate to experience.
Basár had a number of nicely hidden tent spots nestled between trees and bushes. It had camping supplies, besides the availability of hot showers. Getting accommodation in huts was easily possible… and the outdoor grill area was super nice.
Honestly, we didn’t want to leave this lovely place. Can you blame us?
DAY 4-5: Basár/Thorsmork → Botnar (Laugavegur)
Total Distance = 16.2 km
Total Ascent = 680 m
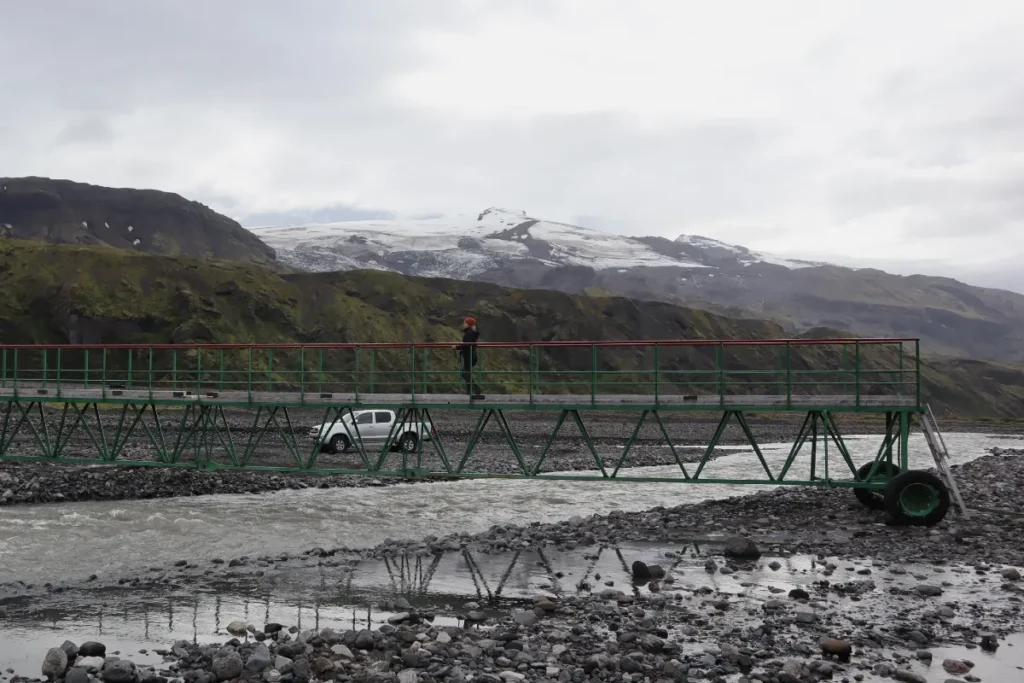
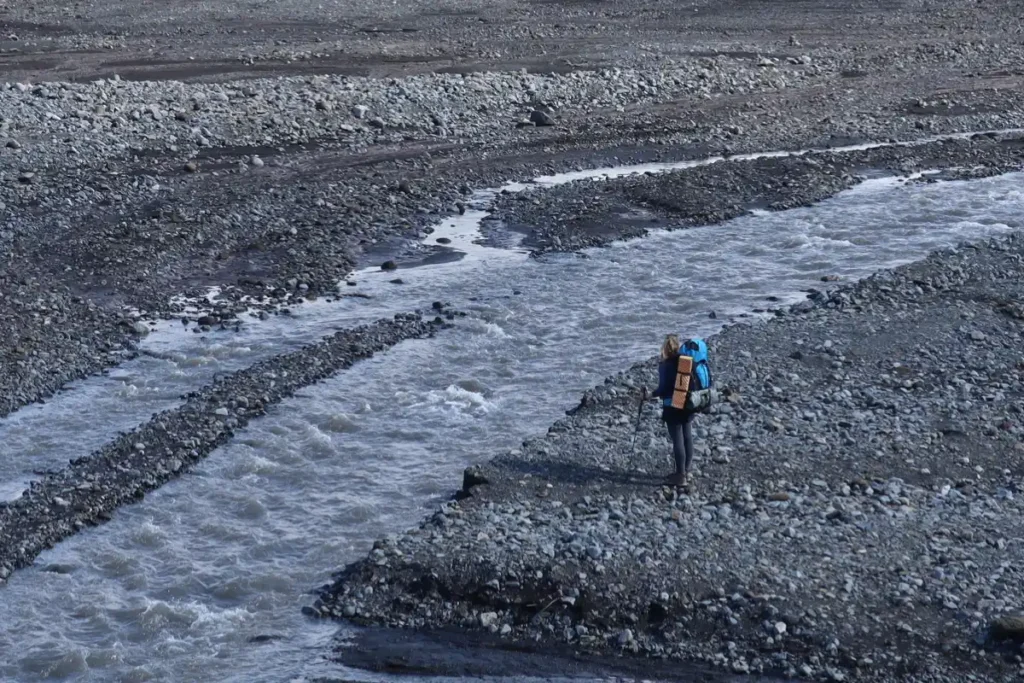
The route from Bashar to Thorsmork is not a difficult 2km walk on a flat terrain, but involves first river crossing of the Laugavegur journey.
A mobile metal bridge spans the deepest and strongest part of the river, but you’ll still need to wade through some shallower sections before reaching the finish. So be ready to get wet!
After leaving Thorsmork, we came across another river crossing (Thröngá river).
The landscape before river quickly transformed into a lush, tree-filled paradise. Since Iceland has mostly barren and rugged terrain, we truly enjoyed being suddenly surrounded by trees.
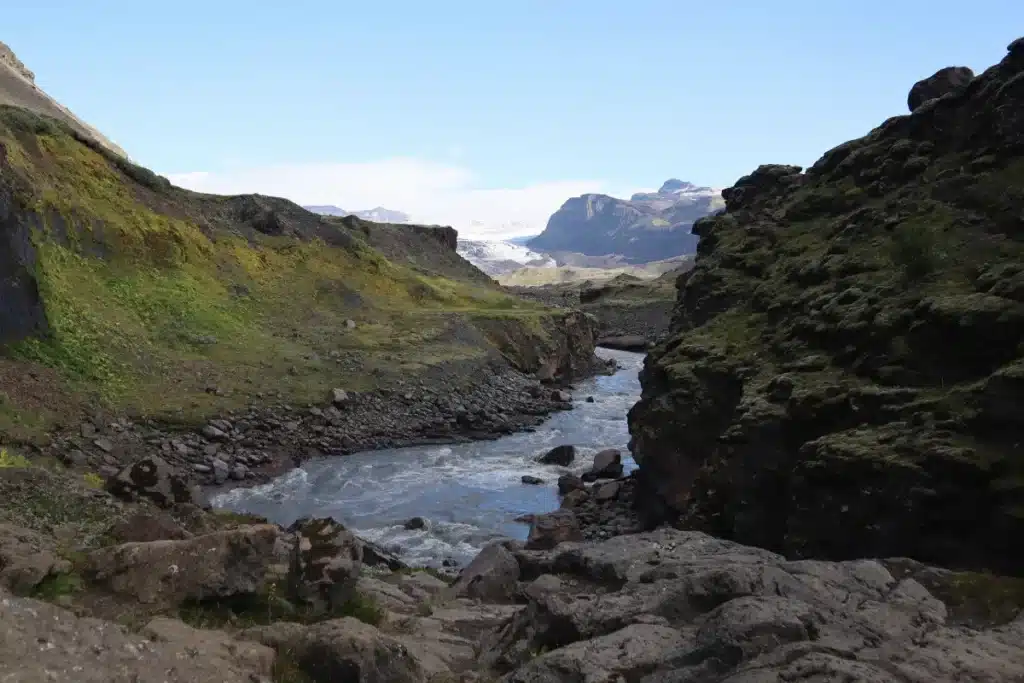
The hike was relatively flat. It was more like a relaxing walk through scenic valleys. However, just before reaching Botnar, the trail took a dramatic turn. We first encountered a narrow canyon with a raging river rushing below. There was a high bridge to cross, and this spot was breathtaking beyond words.

The real challenge came next, as we came across an extremely steep uphill climb. We could see some hikers rapidly slowing down or even stopping to take a break. This section is considered the toughest part of the Laugavegur hike, so those taking the reverse route (south to north) tackle it right at the start!
Despite the difficulty, the well-marked trail rewarded us with stunning panoramic views. We particularly loved the viewpoint that we reached after making it through the steep climb as we could finally see Botnar in the distance.
Botnar has a few mountain huts and plenty of space to pitch a tent. We stayed in the tent, but got caught by a storm during the night, and were moved to one of the huts together with one organized group (guided tour). Since the storm was really intense, we had to stay for one extra night and just patiently wait for conditions to improve.
DAY 6: Botnar → Álftavatn (Laugavegur)
Total Distance = 16.2 km
Total Ascent = 435 m
The hike from Botnar to Aftavatn was relatively straightforward without any dramatic steep sections, but there were a few river crossings along the way. The first one was a shallow river with lots of stepping stones.
The trail remained mostly flat, making for a more relaxed day of trekking. We then came across the Bládfjallakvisl river crossing, followed by a bridge. The route then led us toward Hvanngil.
Hvanngil campsite is close to Aftavatn. So, you can either stay here and restock your supplies, or you can continue and stay at Álftavatn.
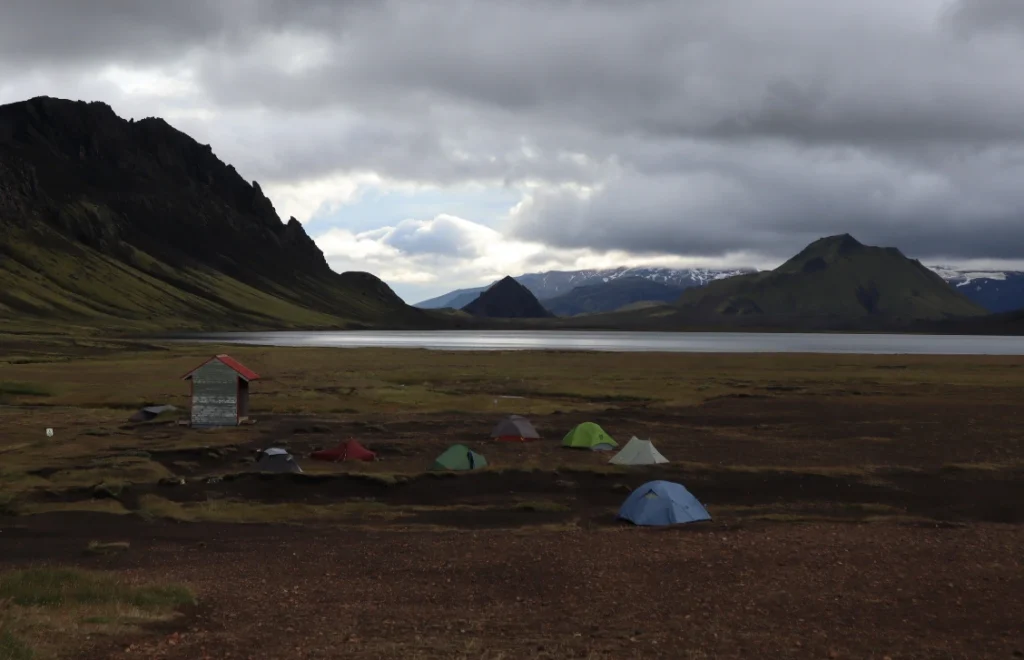
Ola and I decided to continue to Álftavatn, because we couldn’t wait to witness its stunning lakeside. Álftavatn’s charming lake views with a pyramid-like-shaped mountain in the background is all you need after a day spent hiking. Álftavatn also has a small mountain restaurant, serving a daily menu and hot coffee. Could you imagine a better welcome treat?
Álftavatn has some elevation, but it’s completely flat and not protected by mountains, meaning it tends to be windy there. If you’re pitching a tent here, make sure it’s well-grounded (ideally weighted by rocks) to withstand the strong gusts.
Also, we came across another river crossing (Brathálskvisl river) when we left Hvanngil.
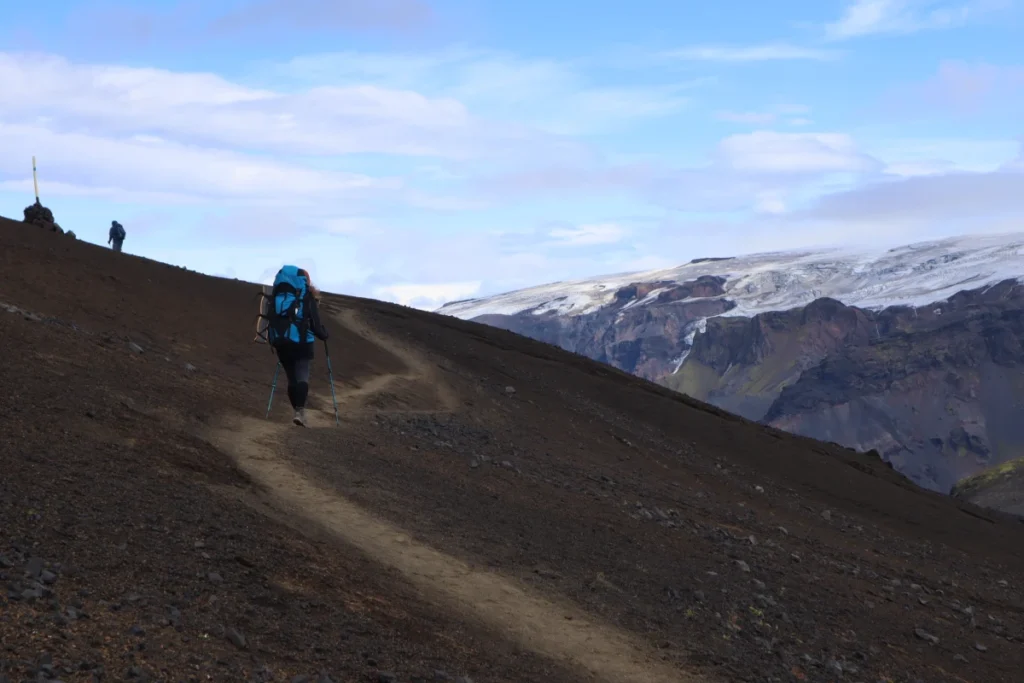
DAY 7: Álftavatn → Landmannalaugar (Laugavegur)
Total Distance = 23.8 km
Total Ascent = 955 m
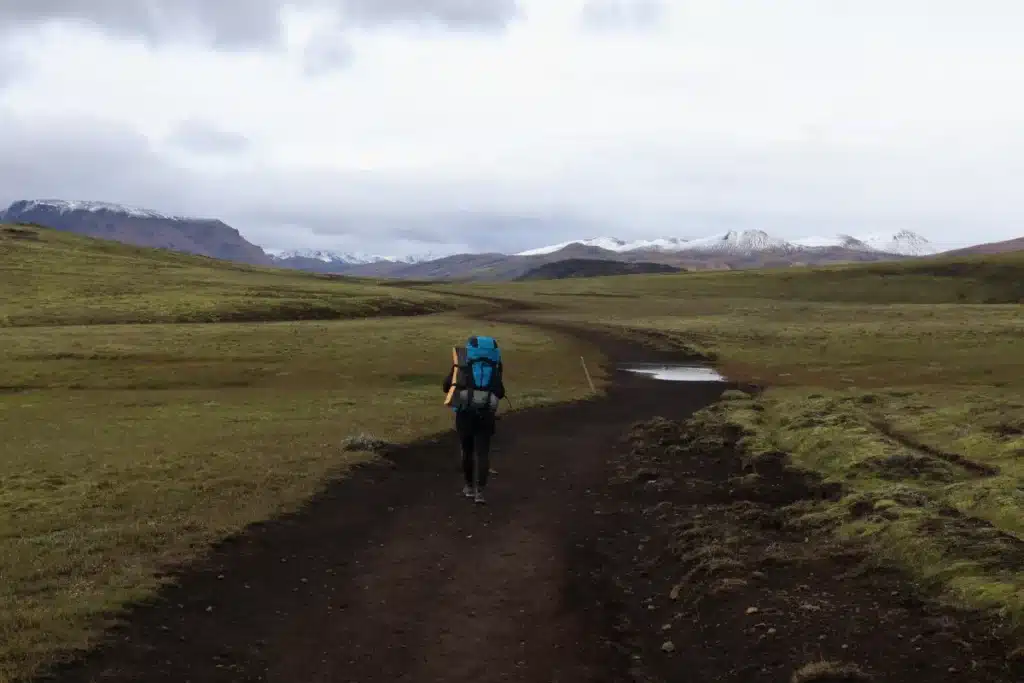
This was, without a doubt, the most challenging day for us. We were caught in a surprise summer snowstorm, with visibility so poor that we could barely see a few meters ahead. The temperature suddenly dropped to zero, and after hours of hiking through the freezing conditions, we were really cold.
Most of the route was a relentless uphill climb into the snow-covered mountains.
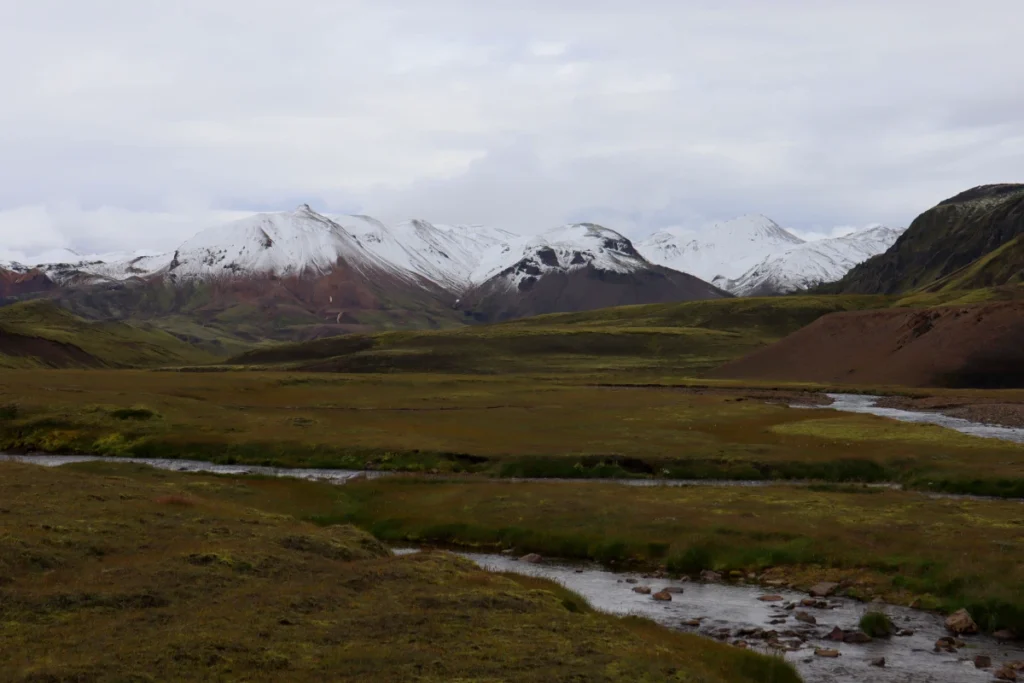
Thankfully, the occasional hot stream crossings provided brief moments of warmth. There was also one freezing cold stream just before the first steep uphill section. It had a rope for support while crossing.
About 6 km from Hrafntinnusker we caught our first glimpse of the hut in the distance – but this section was (due to conditions) deceptively difficult. The path meandered up and down through barren ash plains, with muddy and slippery trails making every step a challenge, especially in wet and snowy conditions.
Some hikers choose to stay overnight at Hrafntinnusker hut before continuing to Landmannalaugar the next day. We only stopped for a quick break to warm up and grab a bite to eat. After that, 90% of the remaining route was downhill.
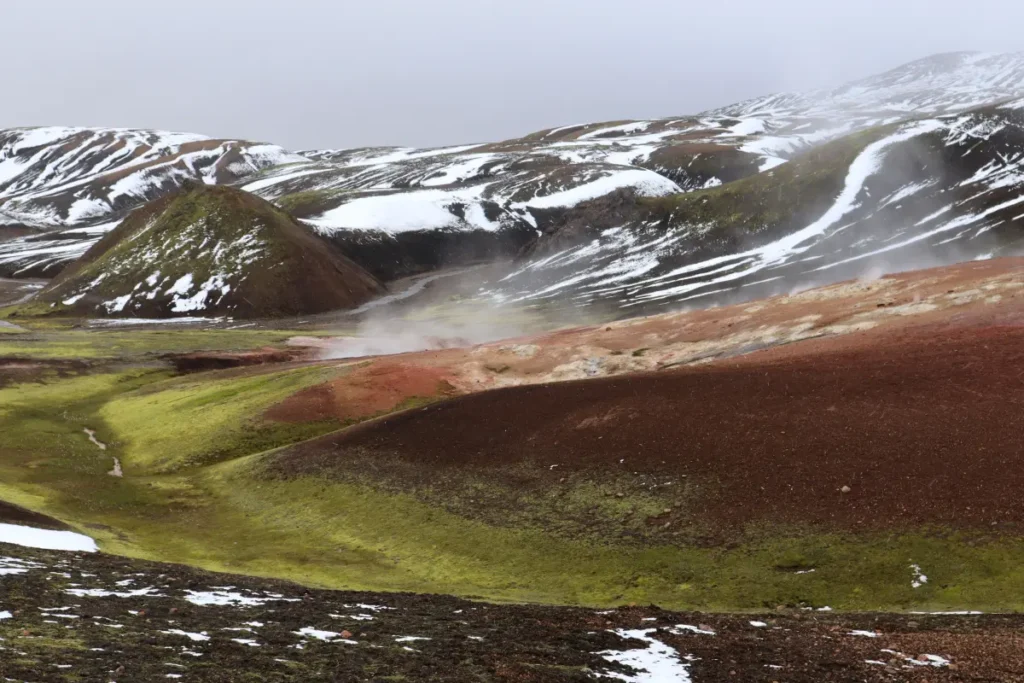
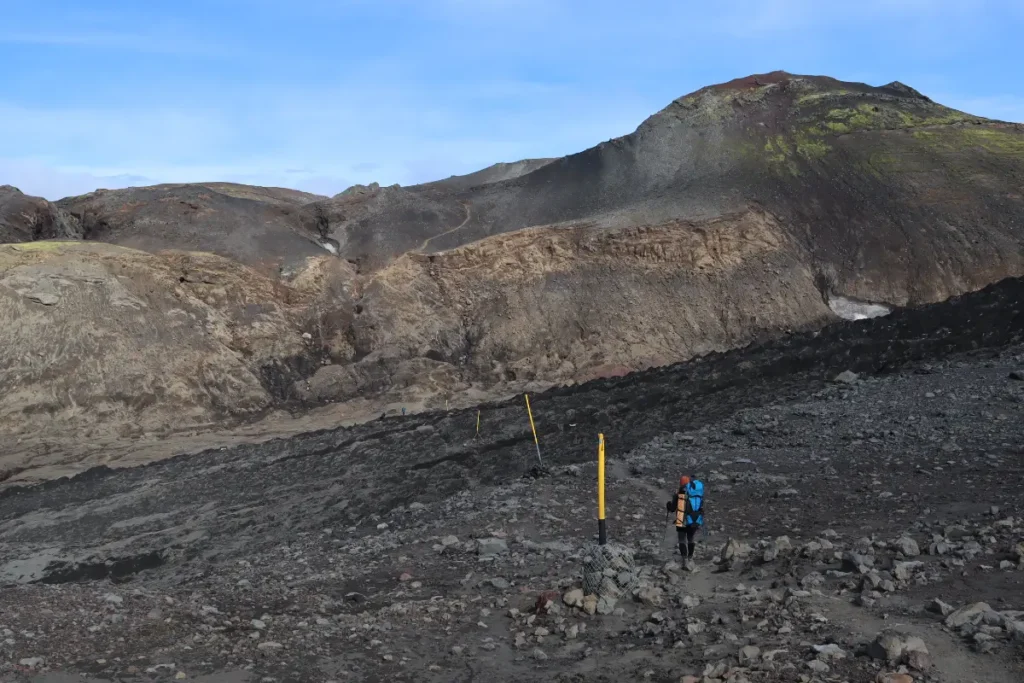
The final stretch was breathtaking, with stunning views of the Rainbow Mountains. We couldn’t resist stopping for photos at every turn. The trail then led us through steaming geothermal area and, just before reaching Landmannalaugar, we witnessed an enormous magma field. This was a dramatic final to an already epic journey!
Laugavegur Hike Packing List
Clothing:
- Base Layer – long-sleeve top (merino wool or synthetic), leggings (merino wool or synthetic), hiking socks (merino wool), moisture-wicking underwear (2-3 pairs)
- Mid Layer – fleece or lightweight down jacket, insulated hiking pants
- Outer Layer – waterproof & windproof rain jacket (GORE-TEX or similar), rain pants, lightweight gloves (waterproof if possible), warm hat (beanie), neck gaiter or buff
- Footwear – waterproof hiking boots, lightweight camp shoes or sandals (for river crossings & campsites)
Backpack & Gear:
- Large waterproof backpack
- Sleeping bag (rated for at least -5°C / 23°F limit)
- Sleeping pad (insulated)
- Lightweight tent (if camping)
- Tarp (if you prefer)
- Water bottle
- Water filter/ purification tablets
Food & Cooking:
- Lightweight stove + fuel (if camping)
- Cooking pot & utensils (if camping)
- Lighter & waterproof matches
- Lightweight meals (freeze-dried or dehydrated), snacks, energy bars, nuts, dried fruit
- Collapsible bowl & spork
Hiking Gear:
- Trekking poles
- Microspikes
- Gaiters (for wet/muddy conditions)
- GPS or offline maps
- Laugavegur trail map
- Compass
- Head torch
- Personal Items
- Sunscreen & lip balm
- Sunglasses
- Personal hygiene (toothbrush, toothpaste, wet wipes, toilet paper, menstrual products)
- Quick-dry towel
- Hand sanitizer
Other Essentials:
- First aid kit (blister pads, painkillers, bandages, antiseptic)
- Multi-tool or knife
- Duct tape for repairs
- Small power bank (charging devices)
- Earplugs (for noisy huts)
- Camera
- Cash & credit card
- Trash bags
If you can get downloadable PDF version of the packing list here.
Laugavegur Travel Tips
When crossing a river, look for wide, shallow sections and avoid areas with white water. Take slow, steady steps, and if unsure, wait for others and cross together. Pack sturdy water shoes, sandals, or Crocs for river crossings, and avoid flip-flops. Use a carabiner to clip your footwear to your bag. You can also use hiking poles to get extra stability when crossing.
As mentioned earlier, Laugavegur takes 3-4 days and if you hike Fimmvörðuháls as well, it takes 5-6 days. So, you need to pack accordingly. Try to avoid unnecessary weight by packing light, and just keep the essentials. Take at least a 60 to 70-liter backpack with a proper back support.
Make sure you’ve done all your research before you go, or book a guided tour. If you hike in reverse direction (south to north), make sure to plan your transportation carefully as most bus schedules cater to the traditional route. The mobile connection is generally unavailable along the trail, so keep that in mind. Make sure to carry offline maps and GPS.
Interesting Facts
- “Laugavegur” translates to “The Landmannalaugar Trail” or “hot springs route”. “Lauga” is, in fact, a short version of the word
- “Landmannalaugar” which itself translates to “people’s pools”. This name has caught on due to bubbling geothermal hot springs present in the area.
-
“Thórsmörk” translates to “Thor’s Valley”. According to a legend, this valley was created when Norse god Thor struck his hammer, Mjölnir, on the earth.
- “Fimmvörðuháls” translates to “five-cairn trail”.
-
The Magni and Móði lava fields that you come across on the Fimmvörðuháls trail are named after Thor’s sons. These craters were formed after a massive volcanic eruption from Eyjafjallajökull in 2010. The word Eyjafjallajökull translates to “glacier of the mountains of the islands”.
- Laugavegur trail was listed among top 20 most beautiful trails in the world by National Geographic.
- While hikers take 3-4 days to cover the 55 km length of the Laugavegur hiking trail, Thorbergur Ingi Jonsson covered it in 3 hours 59 minutes in 2015 Laugavegur Ultramarathon. Can you top that?
- Laugavegur is one of the oldest and most popular shopping streets in downtown Reykjavík, known for high-end boutiques, restaurants, and bars.
Summary
The Laugavegur trail runs from Landmannalaugar to Thorsmork. Most people start from Landmannalaugar and hike to the south, but hiking in opposite direction has its own advantages.
The trail is 55 km (34 mi) in length and takes 4-5 days to complete, but can be extended by another 26 km (15 miles) by combining it with the Fimmvörðuháls trail, which connects Thorsmork to Skógar.
You can either drive to the trail, use a public bus, or join a tour. There are huts and campsites along the trek, so lodging is never an issue. The trail is moderately challenging, and includes a few river crossings as well. The path isn’t exhausting but the Laugavegur weather conditions can be tough. We’d recommend solo hikes only to experienced hikers. Since it’s a multi-day hike, make sure to carefully plan everything and pack efficiently.
Facebook
Pinterest
LinkedIn
Twitter
How do we rate this location?
FAQ
Where is the Laugavegur trail located?
The Laugavegur runs through Iceland’s Southern Highlands, from Landmannalaugar to Thorsmork, passing Hrafntinnusker, Álftavatn, and Emstrur. It can also be combined with Fimmvörðuháls trail by starting or ending your trek in Skogar that connects to Thorsmork. The trailheads of Thorsmork and Skogar are located at a 2-3 hour drive from Reykjavík, while Landmannalaugar takes about 3-4 hours from the capital.
When does the Laugavegur trekking trail open?
The Laugavegur hiking trail opens in summer, from late June to early September.
How difficult is the Laugavegur hike?
It’s a moderate to challenging hike with a length of 55 km (34 miles). You can expect 5-7 hours of hiking (around 13 km) everyday over varied terrain, including river crossings. The path (except for the Hrafntinnusker ascent) isn’t exhausting. I believe that Laugavegur weather is the biggest challenge. The Icelandic Highlands are notorious for heavy rainfall, harsh windstorms, extreme mists, and unpredictable conditions.
How far apart are Laugavegur trail huts?
Laugavegur trail huts are spaced 12-16 km (7.5-10 miles) apart. There are 6 huts on the Laugavegur trail and 2 huts on the Fimmvörðuháls trail
Do you need a guide to hike the Laugavegur?
If you’re hiking for the first time, you may consider joining a guided tour since it’s a multi-day hike with unpredictable weather conditions. We would recommend solo hiking to experienced hikers only. A guided tour provides support, navigation, safety, and logistics, allowing you to focus on the experience. Solo hiking has its own benefits as well. It’s affordable and gives you more flexibility. The trail is clearly marked and you can easily make it independently if you’re well versed in navigating outdoors. When hiking solo, make sure to do a research, carefully plan everything, and go well-equipped.
Does the Laugavegur have cell coverage?
There’s almost no cell coverage on the trail. You can sometimes get reception in huts, but it will be better if you don’t count on it. Please bring a physical Laugavegur trail map, compass, and GPS for navigation.
> YOU MAY ALSO LIKE

Langjokull Ice Cave – Ultimate Review of a Man-Made Glacier Tunnel
31 May 2026
No Comments

Falljökull Ice Cave & Glacier Hike Tour – Our Honest Review
26 February 2026
No Comments
TABLE OF CONTENTS