
Hvannadalshnúkur – Hike to the Highest Peak of Iceland
- GoAndXplore
- No Comments
Hvannadalshnúkur – Hike to the Highest Peak of Iceland
- GoAndXplore
- No Comments
Facebook
Pinterest
LinkedIn
Twitter
If you want to go somewhere where you have to pause every other minute to gasp at the breathtaking views, Hvannadalshnúkur should be on your bucket list. This mighty volcano, blanketed by swathes of ice, is the highest peak of Iceland… and a must-visit spot for anyone who loves to hike.

The hike is long – somewhere rocky, somewhere frosty, but never bland. It may seem like a low peak at some points, but you will get to know when you are on it.
The views of the sky, endless glacial space, icefalls, and crevasses will have you awestruck by every moment. In a single expedition, there is so much to experience for a lifetime.
If you plan to explore Hvannadalshnúkur, here is everything you need to know.
TABLE OF CONTENTS
Quick Facts
- Elevation: 2110 meters (6921 ft)
- Location: Vatnajokull National Park, Southeast Iceland
- Duration: 13-15 hours round trip
- Trip Distance: 22-24 km approx
- Difficulty Level: Hard – requires glacier hiking skills & enough stamina
- Best Season: April-June
- Starting Point: Skaftafell Base Camp or Sandfell
- Main Hazards: Crevasses, unpredictable weather
- Guide: Highly recommended
How to Get to Hvannadalshnúkur?
Hvannadalshnúkur sits at the Öræfajökull volcano glacier situated in Vatnajokull National Park in Southeast Iceland. There are multiple ways to reach the starting point. You may self-drive and join a guide later, or you may stick to a guided tour entirely.
Self-Driving
This is the most flexible option. If you drive to the Skaftafell Base Camp yourself, you will have the freedom to stop anywhere to enjoy the views and do photography. Such trips don’t happen again and again. So, if you want to make the most out of it, this is the way to go!
Here’s the location of Skaftafell on Google Maps
From April to June, you don’t necessarily need a four-wheel vehicle. Another good thing is you can park your car at Skaftafell and stay overnight if you want. Entry is free, but parking is not.
Here are the parking charges and further details.
| Vehicle | Parking Fee (ISK) |
|---|---|
|
Passenger Car (5 seats or less) |
1,040
|
|
Passenger Car (6 to 9 seats) |
1,350 |
|
Motorcycle |
420 |
The fee is valid until midnight on the same day.
The Hvannadalshnúkur hike usually starts at 3 am and lasts for 15 hours in average, so the midnight limit on time will not be an issue.
Note: Even if you go for self driving option, you will still need a guide for the hike unless you yourself are an expert on glacier travel. It is due to the hidden crevasses everywhere on the hike and other serious hazards.
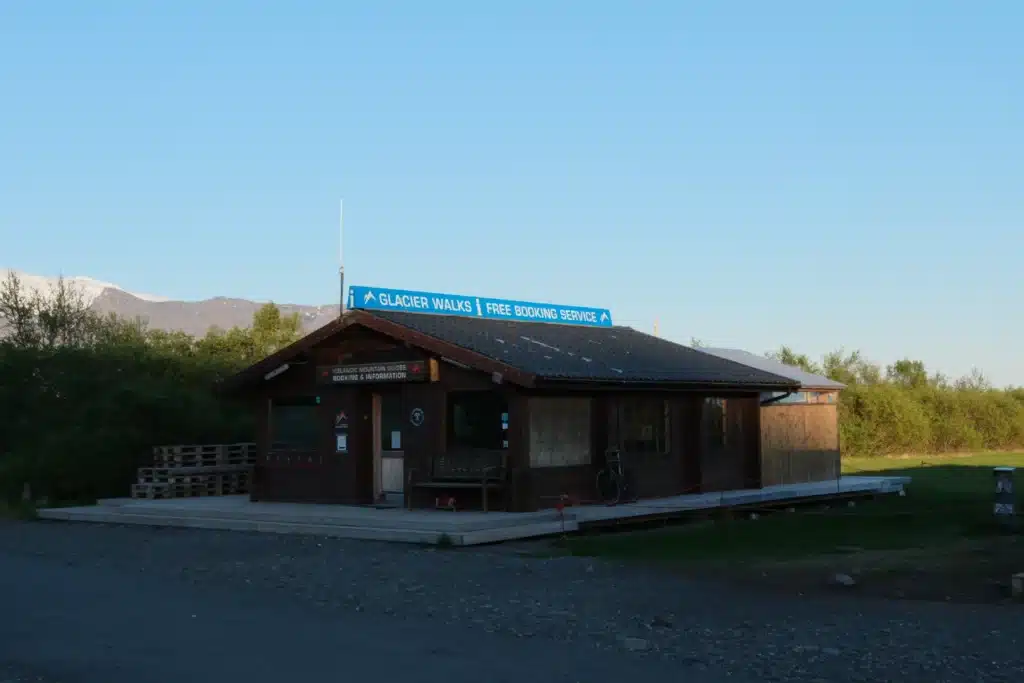
Join A Tour Guide
Most tour guides would also start the journey from Skaftafell or Sandfell and ask you to reach there yourself. You can board a bus on public transportation if it suits you.
A few operators, though, offer pick-up and drop-off from Reykjavík.
While selecting a tour guide, we would like to encourage to pick up the eco-conscious operator, preferably Vakiin certified.
Do You Need a Guide for Hvannadalshnúkur Hike?
Hvannadalshnúkur is not a nicely marked or well-routed trail. It is rough, strenuous, and full of surprises. By surprises, we mean a sudden weather changes or a deep crevasse you can fall into. So, you definitely need a guide.

If anything, there are multiple wrong turns you can make and roam around stranded for hours. At some places, you may feel totally lost at the sight of endless whiteouts.
Only if you are a frequent hiker and have enough skills in mountaineering and crevasse rescue, you may think of going by yourself. Otherwise, we strongly discourage taking risks on a hike this hard.

Checklist to see if you are capable of summitting Hvannadalshnúkur without a guide:
- You have traveled on the glaciers before and mastered the basics
- You can identify hidden crevasses
- You have the skills and gear for crevasse rescue
- You can navigate in snow/icy terrain and whiteouts
- You can handle harsh winds and sudden weather changes
- You can endure a 15-hour climb in frosty conditions
- You are not expecting a neat or marked trail
Go by yourself only if you fulfill all these conditions!
Difficulty + Fitness Requirements
-
Distance:
24 km
-
Trail Type:
Round Trip
-
Time:
15 hours
-
Difficulty:
Hard
-
Elevation +
2116 m
The hikers need to have really good fitness, especially endurance as the hike takes on average 15 hours and you need to overcome more than 2000 meters of altitude in one go.
Ola and I finished the Hvannadalshnúkur hike in 13 hours, but that was mostly thanks to really good conditions and relatively firm snow.
If you are planning to go in the near future, we recommend taking 2 to 3 months for preparation, focusing on leg strength and cardio.
Mountaineering is a difficult discipline, and Hvannadalshnjukur is definitely not to underestimate.
Also, people usually think the descent is easy, but that is not the case. You have to be strong in your knees, especially for the last steep rocky section before the Sandfell where the hike starts.
Moreover, to be ready for any unforeseen conditions, such as extreme winds, your reflexes should be sharp.
Focus on these to build cardiovascular and physical endurance:
- Core and lower body strength
- Leg balancing exercises
- Stair climbing exercises
- Cardio ( 3 to 4 times a week)
If you are training for Hvannadalshnúkur, it’s a good idea to build up gradually on easier and equally scenic hikes like Kristínartindar.
Route Breakdown from Trailhead to Summit
The Hvannadalshnúkur hike is typically divided into four stages. The views change dramatically with the each stage.
The First 1100m (3 to 4 hours)
The exploration starts at Sandfell, which is located along the Ring Road/ Route 1 in Iceland. This is where you will check your fitness as the terrain is rocky and steep straight from the start.

On the way up, you will pass the waterfall and small stream, this is one of the last stops to refill your water bottles. You should carry at least 3 liters of water, otherwise you may end up dehydrated.
Continuing your way up to the first 1100m of elevation, you won’t feel like you are on a glacier till you reach the glacial line.

During this time, you may witness clouds steadily flowing across valleys and a beautiful sunrise if you depart early in the morning.
The Next 1100 to 1800m (2 to 3 hours)
This is where the true glacial hike begins! From here, you will need a great presence of mind, rope, ice axes and potentially your crampons as well. It is essential to have an experienced person or guide with you since this phase is full of hidden crevasses.
This part will be tough on the mind, too, as you won’t see the peak.

The air may feel little thinner and section in general tend to be more windy as you will be moving through open space.
The path will lead you to higher altitude of the icecap until you reach the awe-inspiring caldera rim in about 1800 m a.s.l.
The 1800m (1 to 2 hours)
For some time, there will be no ascend as the terrain is almost flat. But you should stay alert and navigate the terrain correctly as near by icefall creates deep crevasses at its fold.

Most people travels this section by navigating a large circle away from the edge of the icefall.
The Final 1800 to 2100m (1 to 2 hours)
This is the last part you have to traverse. Here, the snow is usually more firm, and it is relatively easy to ascend. But the slope gets sharper and more slanted. You may find a need to use your crampons here.
Anyway, it’s just 300 more meters of altitude and you will be at the top of Iceland!

When it comes to descent, you follow the same path. Overall, this may feel more exhausting as you already expelled energy on the summit and can be very hard on the hips and knees.
What’s the Best Time for Hvannadalshnúkur?
If you want to avoid hazards and bad weather, then April – June offers the best and the safest conditions for the Hvannadalshnúkur hike. You also get plenty of daylight.

Iceland is known for its unpredictable weather and extreme winds and undertaking the hike in other times introduces more risks.
From April – June (Spring Season)
- The snow cover is relatively stable
- Most crevasses get bridged due to winter snow
- You get more hours of daylight
- Temperatures are moderate
- The weather and winds at the top are more manageable
From July – August (Summer Season)
- The hike is possible and in fact more visible, but be ready for:
- Crevasses wide open
- Weaker snow bridges
- More slippery slopes and difficult rope management
From October – March (Winter Season)
A hike on Hvannadalshnúkur in these months is better to avoid. It is not recommended due to:
- Almost zero visibility
- Severe cold
- Heavy snow cover
- Hurricane-induced winds
So, the best and most suitable time for this activity is from April to June. The weather is mild, and you can actually enjoy it rather than focusing on survival.
For more insights into Icelandic weather, read our detailed guide here.
What to Pack for Hvannadalshnúkur Hike?
Make sure to carry all of these before you start your journey to Hvannadalshnúkur:

- Crampons
- Rope and crevasse rescue gear
- Helmet
- Ice axe
- Harness
- Layered clothing according to freezing temperatures (even in Spring & Summers)
- Mountaineering boots
- Ski or glacier rated goggles
- Extra waterproof gloves and clothes for emergency
- Offline navigation map, compass
- GPS
- Energy foods and drinks
- At least 3 liters of water
- Camera
- Sunscreen and moisturizer
- Power bank
Also, check out our detailed Iceland packing guide.
Best Photography Spots & Must-See Sites
Hvannadalshnúkur offers so natural views that change character after every hundreds of meters. For a moment, you will be staring at clouds running parallel to you, a sudden waterfall, beautiful rocky blocks, or ice beds out of nowhere.

If you are taking out the time and courage to explore this stunning peak, make sure to see and record yourself at the following sites.
Sandfell Parking Lot (trailhead)
An important spot as you start your trip from here! Or to be dramatic, it may be the last familiar human made structure you may be seeing that day. After that, you will be exploring your valor in the wild!
Steep Rocky Section From Sandfell
If you had skipped your geology classes, this section may look like just some rocks to you. But it isn’t really. This steep rocky terrain carries the history of a volcano. On closer inspection, you may notice lava fragments and unengineered rock plates. Even the black gravel looks stunning.
After the Steep Section Towards the Icecap
That’s where the magic happens. You will find yourself standing at the edge of black loose gravel, all spread on earth and fields of ice just one step ahead of you!
Icecap Towards the Icecap Ridge
Through this section, you will witness dramatic sky views that change colors every few minutes – from pink, to white, to blue. The visuals will be cinematic yet purely natural!
Icecap Ridge to Under the Summit
This part is usually accompanied by cold winds. The layers of clouds and ice will appear to have merged into one.
Summit Push
People often feel like embraced in the white walls of snow at this point. You will find clear views of the ice slopes. Somewhere, the glacial edges will appear as if a flowing river got frozen in time.
Summit Itself
This is the point when you find out why people come to Hvannadalshnúkur despite all the risk and danger. You will see the majestic glacier system in its entirety. At a glance! It is so holistic that words cannot contain the view. See yourself!
Note: If you are based around Skaftafell, the stunning Svartifoss waterfall is another must-visit stop.
Safety Risks on Hvannadalshnúkur
The Hvannadalshnúkur hike can quickly become a nightmare if you take it too casually. Here is few hazards you must keep in mind when you are out there.

Crevasses
Hvannadalshnúkur is a moving glacier. That means a lot of unexpected, hidden crevasses. This is the single largest hazard on the hike. InSpring and Summer, crevasses are more visible like wide openings. In other months, they are sheathed in snow cover.
Whiteouts
Another thing that makes this journey especially dangerous is the glacial whiteout.
Some people refer to experiencing a glacial whiteout as being stuck in a bowl of milk. In such conditions, you experience vertigo, instability, and disorientation, and can’t tell if you are moving upwards or downwards. If the weather is harsh, you won’t even be able to tell if you are on a flat plane.
Strong Winds
Winds in Iceland are bad! You may find it really hard to balance yourself if Hvannadalshnúkur weather gets windy on the climb.
Cold
The chilled winds combined with low temperatures can make you numb at times. If you aren’t appropriately dressed, it may cause severe shivering and hypothermia.
Slide Lines
The slopes on the glacier can get slippery, and it can become hard to maintain grip even with ice axes and good shoes. In extreme conditions, you may slide hundreds of meters.
Weather Changes
In rare cases, if you are short on luck, the weather might change unexpectedly. Your planning may fall short and you will have to turn around.
Important Safety Tips
The hazards are there, but the hike will be truly rewarding in terms of views and experience. Once you conquer the peak, you will feel like there is nothing you can’t do. The feeling will last momentarily, though, unless you start the descent!

Anyways, here are some tips from our side to ensure your safe return.
Check Hvannadalshnúkur weather in advance and abandon the plan if the forecast is off.
Move in a rope team. The weather and glacial conditions can change. So summit the Hvannadalshnúkur in team, preferably with an experienced guide.
Don't skip the safety gear.
If at some point, you feel exhausted or challenged or the weather gets tough, turn around to avoid risk.
Since the hike must be finished in a day, keep eating and drinking to feel energetic.
Carry a GPS device, offline map and compass for navigation.
In addition to these, please act responsibly. Don’t harm the environment or vegetation. Leave no trace behind. Take nothing but memories, and leave nothing but footprints!
Cost Breakdown + Guided Tour Options
From the price point, Hvannadalshnúkur is expensive!
You must hire a guide, and you cannot skip anything from the safety gear. If you take a guided tour with a company, you may not need to buy or rent the equipment. In that case, just pay for the tour operator.
Most guided tours charge around $400-$475 per person from Skaftafell. Some private and premium ones can charge even more. There are cheaper options as well. But it’s better not to compromise your trip for a few bucks.
If you skip the guide and go by yourself. Here is what you must keep in mind for the overall approx cost:
- Crampons $15/ day on rent
- Helmet $10/ day on rent
- Ice Axe $15/ day on rent
- Harness $10/ day on rent
- The glacier rope system/crevasse rescue is usually not rented. Costs up to $200-300 on purchase.
Also, renting the gear in Iceland might be challenging as rental services are very limited.
Note: These are approx rates. Actual rates may vary with tour operators. Also, this is exclusive of the cost of waterproof clothes, gloves, ski goggles, and other stuff.
Summary
Hvannadalshnúkur is the highest peak in Iceland. It is located Vatnajökull National Park, on top of the Öræfajökull volcanic glacier system.
The total travel distance in standard routes toward the summit area is around 22-24 km round trip, which usually starts at Sandfell.
Most expeditions take about 13-15 hours in total, with early departures often around 2-4 AM to maximize daylight and safer conditions.
The elevation gain is more than 2,000 meters, so it’s one of the most physically demanding hikes in Iceland. But still, you can complete your round trip in less than a day. In case you are looking for a multi-day trek, the Laugavegur trail can be a good option.
We hope we were able to answer all your questions. If not, feel free to drop a comment below.
Facebook
Pinterest
LinkedIn
Twitter
How do we rate this location?
FAQ
What is the highest mountain in Iceland?
Hvannadalshnúkur is the highest mountain in Iceland, located in Vatnajokull National Park.
Is the Hvannadalshnúkur hike good for beginners?
Not at all. It is a tough hike that requires preparations and mountaineering skills.
Is there an age limit for the Hvannadalshnúkur summit?
Most tour operators set the minimum age to 16 or 18. However, there might be exceptions, all depends on tour operator policies and individual’s fitness level.
Do I need to train for the Hvannadalshnúkur hike?
Yes, good fitness and health is required. The Hvannadalshnúkur hike is a full day endeavour with over 2000m of elevation and it’s 24km long. You need enough stamina and leg strength to complete it.
Is there any danger from the volcano?
No, the volcano has been dormant for a long time.
> YOU MAY ALSO LIKE

Falljökull Ice Cave & Glacier Hike Tour – Our Honest Review
26 February 2026
No Comments

Katla Ice Cave Tour Review in 2026 – Is It Worth Visiting?
5 February 2026
No Comments
TABLE OF CONTENTS